

Add your Google Analytics 4 code to your website in 7 simple steps.
Have you switched to the new Google Analytics 4 yet? On October 14th, 2020, Google released Google Analytics 4. Every time Google releases big updates or versions of Analytics, it is important to upgrade and give your website all of the latest benefits that come with the update.
If you recently redesigned your website or have never used Google Analytics before then you might ask yourself how to start tracking your website metrics with Google Analytics 4 (GA4).
This is a little different process than it was before with Universal Analytics, but it is very easy to do and we explain in the next steps how to do it.
- Head over to the Google Analytics homepage and login with your Google account. This gives you access to your dashboard.
- If you haven’t already created an account then check the following link to our “Google Analytics 4 – FAQs” article and learn how to set up a Google Analytics 4 property from scratch. If you have already created a GA4 property and want to integrate it with your new WordPress site, then follow the next steps.
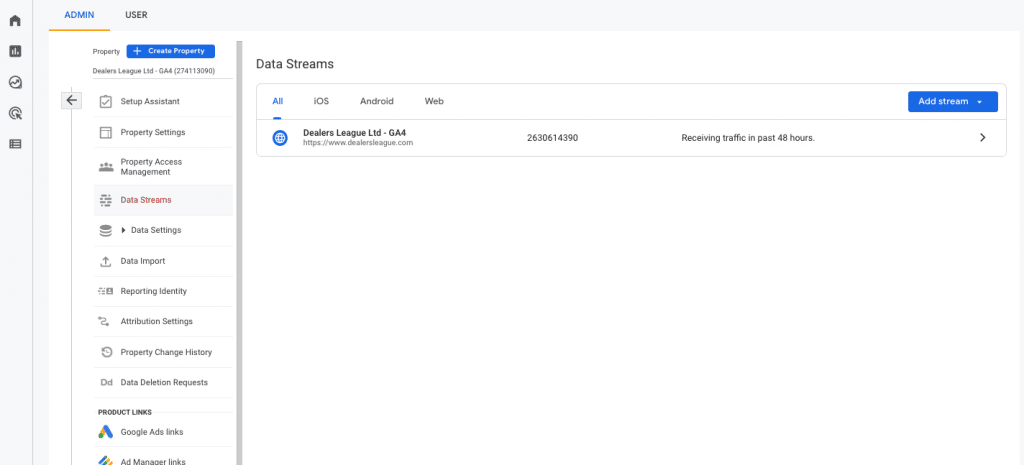
- Now click on “Admin” and choose your “Data Stream”.
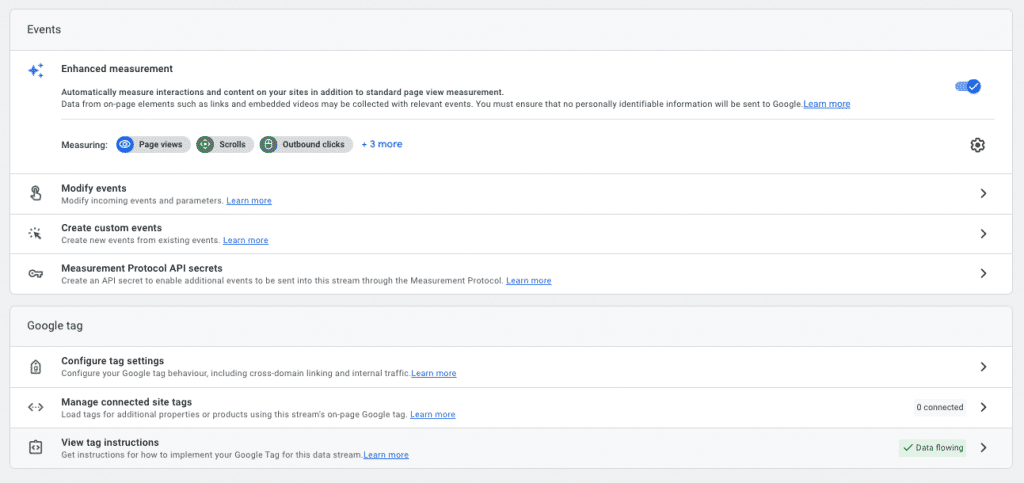
- Click on “View tag instructions”.
- Choose “Install manually”.
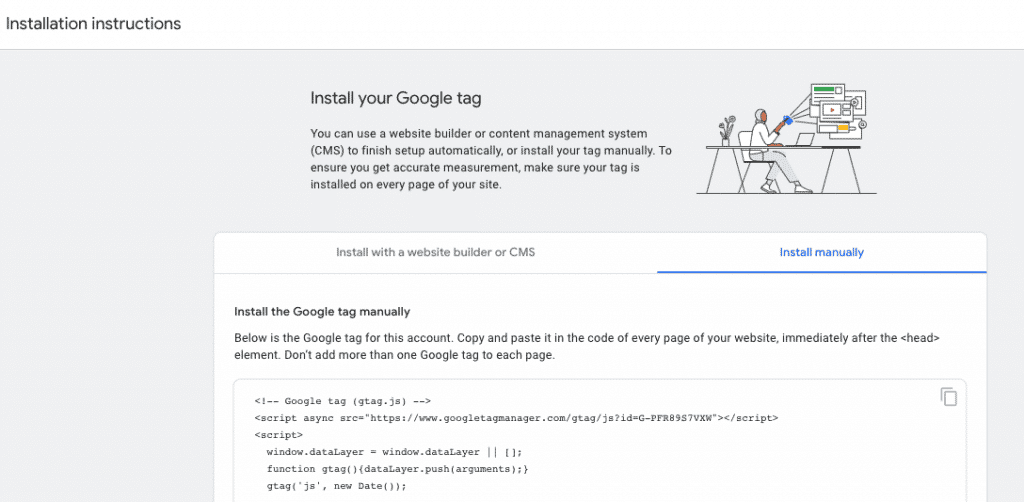
- Copy the code and head over to your WordPress site.
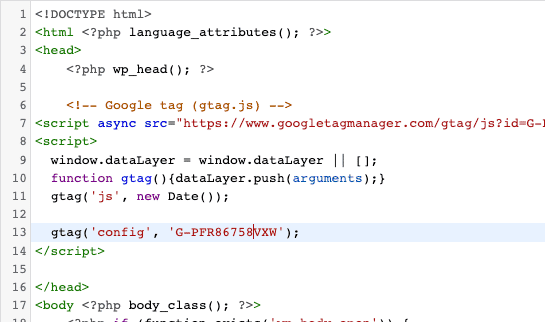
- Go to Appearance > Editor > header.php and add your Google Analytics code right before the ending </head> tag or after the opening <body> tag.
If you want to check if the code work then go to your Google Analytics 4 property and check the real time report and see if it tracks visitors on your website.

